
After years of fine art printing experience, I finally got my nerve-up to try the ultimate: platinum-palladium printing
I recently made my first attempt at platinum-palladium printing. If you’re curious about it, watch my video and use the lists below to get you started. Have fun!
Step-by-Step Process
- Mix up the chemicals for the paper coating, developing, and clearing baths
- Coat the paper carefully and thoroughly, allow to dry at least 30 – 45 minutes
I used the Bostick & Sullivan formula for coating an 8 x 10″ sheet:
– Ferric Oxalate Solution #1 – 12 drops
– Palladium Solution #3 – 12 drops
– 5% Sodium Platinum Solution Na2 – 6 drops - Sandwich coated paper and negative tightly under glass. A contact printing frame is recommended
- Expose to UV light (this could be the sun, but a controlled light source is recommended). In my particular setup, the exposure time was 2.5 minutes.
- Place exposed print into developing tray. Carefully but quickly pour developer over the entire sheet of paper. Print will develop almost immediately.
- Place developed print into the second bath, the clearing bath, which will clear the ferric oxalate solution from the print. This removes the yellow tint from the white areas in the print and help the print to be archival. Takes up to 15 minutes.
- Water bath: rinse the print thoroughly in fresh flowing water for up 30 – 45 minutes
- Dries flat in about 24 hours
IMPORTANT: The developer is reusable, so be sure to store it in a suitable container after use.
What you’ll need
Below is a list of materials you’ll need to make platinum-palladium prints
Paper
You’ll need unbuffered 100% cotton rag paper. (Standard watercolor paper is not recommended). The most highly recommended papers are:
Chemistry
Recommendation: Buy the beginner’s kit from Bostick & Sullivan. They put everything you need to get started into one easy package.
- Ferric Oxalate Solution #1 – 25 ml
- Palladium Solution #3 – 25 ml
- 5% Sodium Platinum Solution Na2 – 10 ml
- 3 plastic droppers
- 32 oz.Potassium Oxalate Developer
- 250 g EDTA clearing agent & 250 g Sodium Bisulfite for clearing

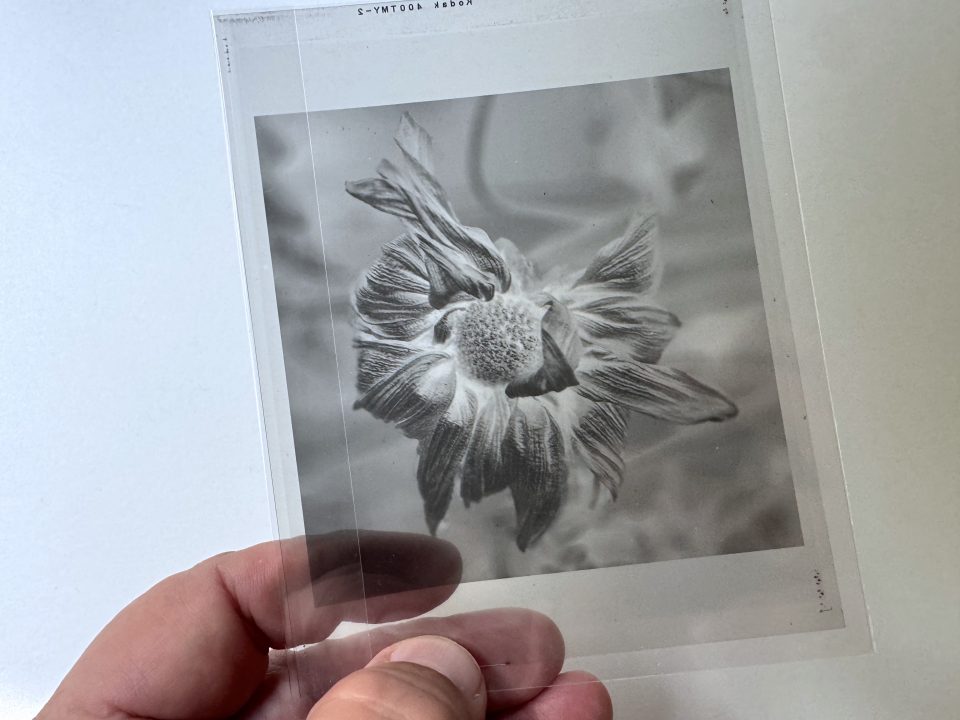
The Negative
Since platinum/palladium printing is a contact printing process, you’ll need a negative at the size of the final print. You can use a large format negative, an LVT film negative imaged from a digital file, or a high-quality digital negative made on transparency film on an inkjet printer.

Other Tools and Materials
- Pictorico brand inkjet transparency film for the negative (AND access to a good quality inkjet printer)
- Contact printing frame or reasonable facsimile
- Paint brushes for coating the paper (some people prefer a special glass coating rod)
- Plastic darkroom trays for the three baths (developer, clearing bath, water)
- Darkroom tongs for each tray
- Shot glass or other small plastic container for mixing the platinum-palladium solution
- UV light source (see below)
- Rubber gloves, eye protection, a face mask, and an apron
- Glass jar for water to wet and rinse brushes
- Optional: Archival print washer
- Distilled water
- Paper towels
- Plastic funnels
UV Light Source
High-end platinum printers use large and well-made UV light boxes, but a much more rudimentary setup can get you started. For my starting setup, I used a simple LED UV light found on Amazon, fitted into hole cut into a cardboard box that’s large enough to cover the contact printing frame.
To my surprise, these affordable little UV lights worked very well.
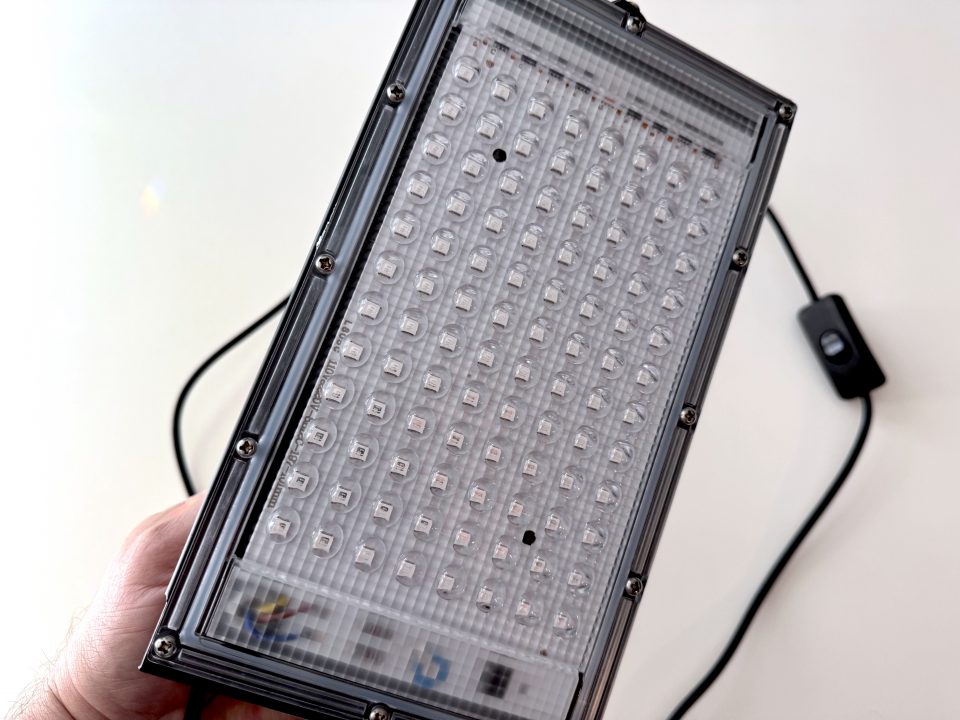
Amazon: Glostars 100W LED UV Black Light, Powerful UV Spotlight, IP66, 395nm Lamp (2 pack)
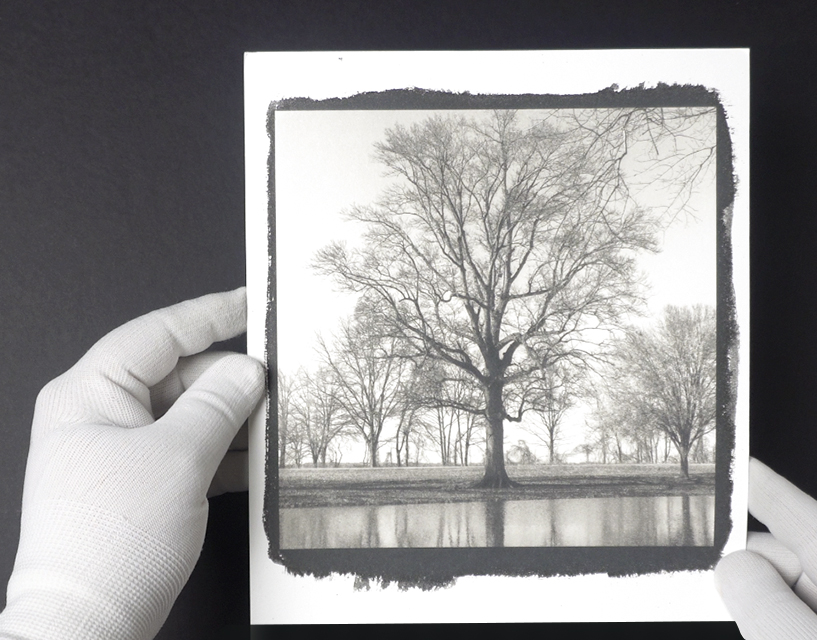
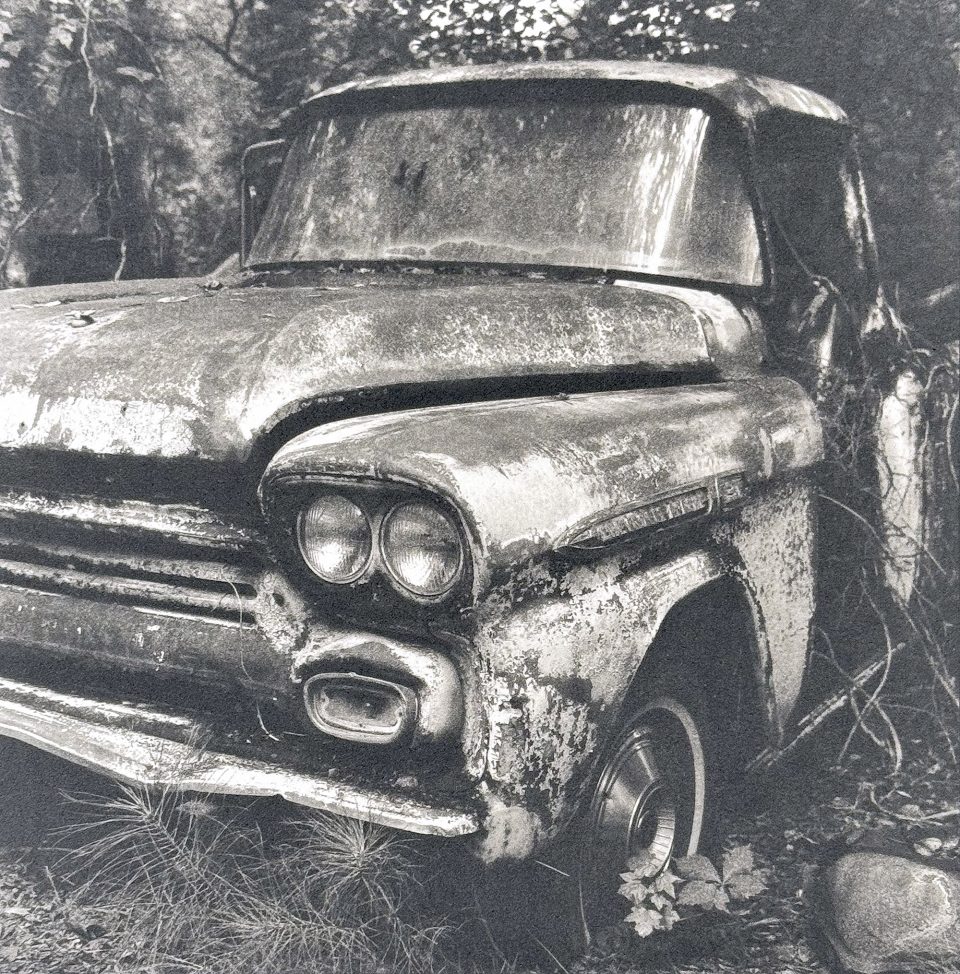
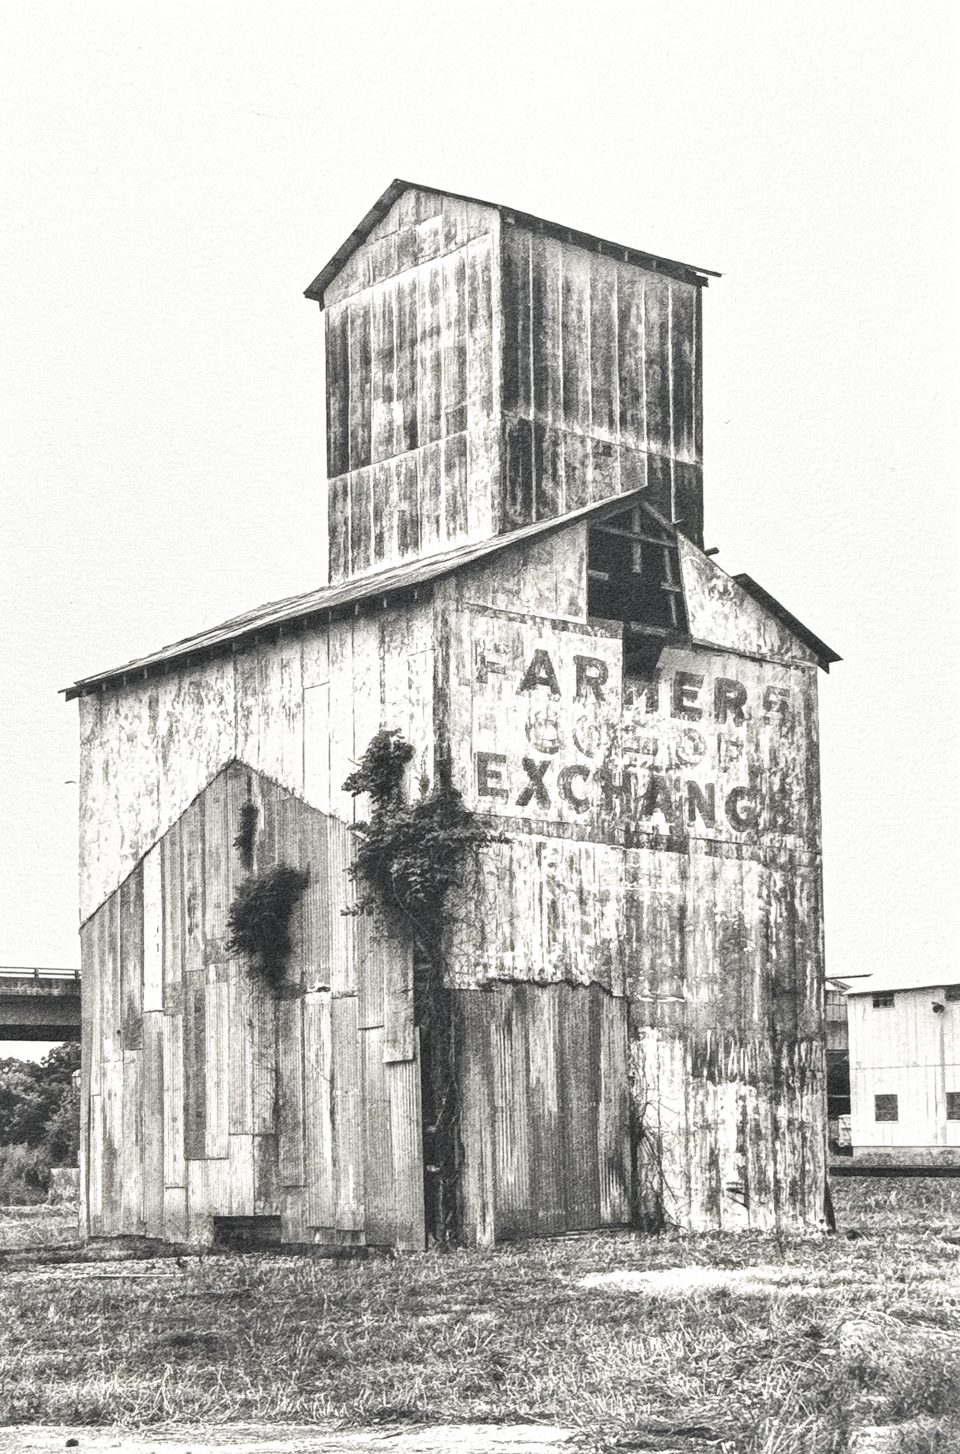
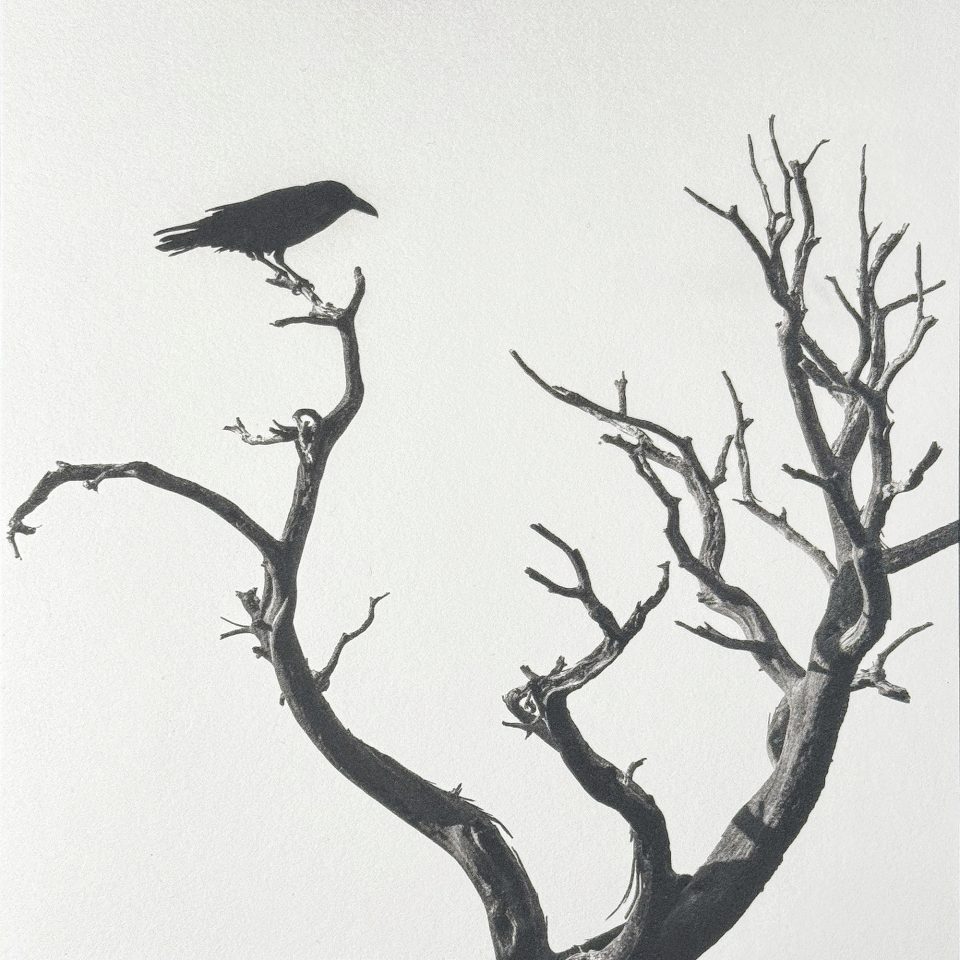
Some of my first ever platinum-palladium prints
NOTE: Contains Amazon Affiliate links. I may receive a small commission on qualifying purchases.
Discover more from Shadows and Light
Subscribe to get the latest posts sent to your email.